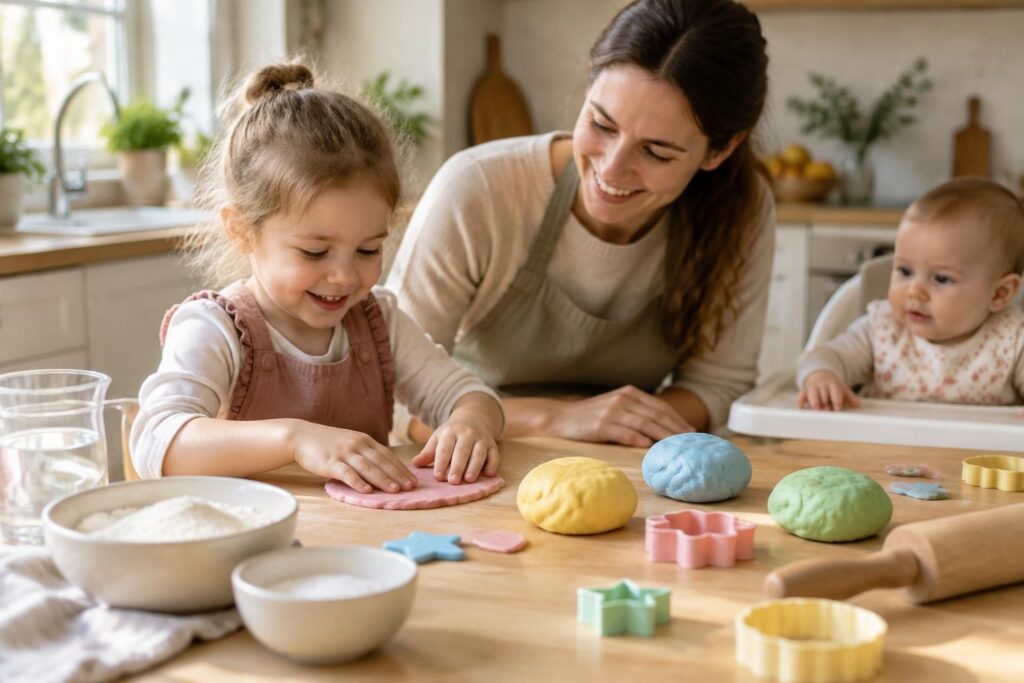
A bowl, a few pantry ingredients, and a little time are enough to prepare homemade modeling clay. This creative activity for children turns an ordinary moment into a sensory exploration: kneading, rolling, crushing, then shapes come to life along with ideas. For parents, the no-cook recipe has another appreciated advantage: it is prepared quickly, without a pot or special equipment.
The classic recipe based on flour and salt is suitable for children who no longer put the dough in their mouths, under adult supervision. However, it is not edible: salt can be dangerous in large amounts and raw flour should not be consumed. For a baby or toddler who still explores with their mouth, it is better to choose a product specifically designed for this age and stay close throughout the activity.
The preparation can also become a small shared ritual. Lina, 3 years old, chooses the turmeric yellow, while an adult measures the water and helps knead. In a few minutes, the dough is ready to receive imprints, imaginary animals, or first letters. The most important thing is not the result: it is the pleasure of handling at one’s own pace.
In brief
- The basic recipe: flour, fine salt, lukewarm water, oil, and, if you have it, cream of tartar.
- The preparation: mix the ingredients then knead until you get a soft dough, no cooking required.
- Safety: the classic recipe is not edible and is not suitable for children likely to put the dough in their mouths.
- The colors: turmeric, cocoa, or food coloring allow you to customize portions.
- Storage: store the dough in an airtight container and throw it away if its appearance or smell changes.
Homemade no-cook modeling clay: the easy recipe
This recipe yields a soft dough that is easy to shape. Cream of tartar improves its elasticity; if you don’t have any, the preparation is still possible, but it will generally be a bit less stretchy.
| Ingredient | Quantity | Role in the recipe |
|---|---|---|
| White flour | 1 cup | Gives structure to the dough |
| Fine salt | 1/4 cup | Contributes to texture and preservation |
| Cream of tartar | 1 tablespoon | Provides increased softness |
| Hot water, not boiling | About 1/2 cup | Allows ingredients to bind |
| Vegetable oil | 1 tablespoon | Helps obtain a pliable dough |
In a bowl, mix the flour, salt, and cream of tartar. Add the oil, then gradually pour in the water while stirring with a spoon: the required amount may vary slightly depending on the flour.
When the mixture has cooled, knead it for a few minutes with clean hands. If the dough sticks, add a pinch of flour; if it crumbles, add a few drops of water. The desired texture is soft, homogeneous, and easy to peel off fingers.
Steps to succeed in a no-cook recipe
The preparation can become a small workshop in itself. Older children can pour the dry ingredients or mix, while an adult handles the hot water and checks the texture. This sharing gives everyone an appropriate role without turning the activity into a task to be perfectly accomplished.
- Measure the ingredients: always use the same cup to keep consistent proportions.
- Mix the powders: distribute the salt and cream of tartar well in the flour.
- Add liquids little by little: the water should be hot but not boiling; an adult should handle it.
- Knead: work the dough until it is smooth and soft.
- Let it cool and test: check the temperature before offering it to children.
A handy tip: first prepare a single neutral portion, then share it among the children. Each child can then choose a color or texture, without multiplying bowls and dishes. For other low-material ideas, discover these creative activities to do with children.
The video can help children visualize the mixing and kneading. However, keep an eye on temperature and texture: a filmed recipe does not replace adult supervision, especially when younger children participate.
Coloring modeling clay with natural ingredients
Once the dough is ready, separate it into several portions to create a small palette. Turmeric gives a warm yellow, cocoa a soft brown, and paprika an orangey shade. The powders incorporate easily in small amounts; add them gradually to control intensity and avoid drying out the dough.
Food colorings can also be mixed with water before adding to the dry ingredients. To get several shades, knead each portion separately. Fresh vegetable juices are possible, but their additional water changes the consistency and they keep less well: a few drops are enough, then adjust with some flour if needed.
Colors are also an opportunity to play. Offer the child to mix two small balls and observe the result: yellow and blue become green, red and yellow approach orange. This exploration transforms creative leisure into educational play, without sheets or complicated instructions.
Modeling clay for babies: precautions and alternatives
The word “natural” does not automatically mean “risk-free.” The classic recipe contains salt and raw flour: it should not be presented as edible, even if its ingredients come from the kitchen. For a baby or young child who still puts objects in their mouth, do not offer this dough; rather choose equipment suited to their age and follow the manufacturer’s instructions.
When the child grows and can handle without putting the material in their mouth, the activity is prepared on a clean surface, with an adult nearby. Avoid essential oils, small accessories that could be swallowed, and colorings or powders used in large quantities. In case of doubt about ingestion, contact a health professional or poison center.
For the youngest, a sensory activity without dough can offer the same joy of discovery: crumpling a clean cloth, touching a damp sponge or handling large objects appropriate for their age, always under supervision. You will also find suggestions designed for young children in this selection of activities for a 2-year-old child.
Modeling develops finger strength, coordination between hands and eyes, and attention to an action. A child rolling a ball or pressing an imprint learns by playing; it is not necessary to show a perfect shape for the activity to make sense.
Storing homemade modeling clay
After playing, gather each color and place it in an airtight container or tightly closed bag. Keep everything in a cool, dry place, away from sunlight. A sheet of baking paper between the colors limits accidental mixing.
Storage duration depends on the recipe, humidity, and hand cleanliness. Check the dough before each use: if it shows suspicious traces, an unusual smell, or altered texture, throw it away without trying to recover it. Preparing small quantities avoids waste and allows easy renewal of the activity.
If it has only dried out a little, knead it with a few drops of water or oil, then observe the result. This correction is not suitable for dough that shows signs of deterioration. A closed container as soon as play is finished remains the most useful gesture to preserve its softness.
Educational play ideas with modeling clay
The dough becomes an educational play support as soon as a small intention is added to the pleasure of handling it. For the youngest, rolling snakes and making balls is enough to train fine motor skills. Later, children can form letters, count small discs, or create a setting for their figurines.
- Imprints: use large appropriate objects to observe shapes and textures.
- Letters: shape the first letter of the name or a character the child already recognizes.
- The little market: create imaginary fruits and vegetables, then count or sort them by color.
- Emotions: model a happy, surprised or upset face and invite the child to tell a story.
These suggestions can evolve according to age and daily energy. A child who simply prefers to crush and start over is already exploring the material; they don’t need to reach an identifiable creation to enjoy this creative hobby. To vary the supports, salt dough and its preparation tips also allow making objects to keep, with a different recipe and required cooking.
Frequently asked questions about no-cook modeling clay
Is homemade no-cook modeling clay edible?
No. The classic recipe contains salt and raw flour; it is not meant to be eaten. Keep it out of reach of children who put the dough in their mouths and always supervise the activity.
What to do if the dough sticks to hands or crumbles?
If it sticks, add a little flour and knead. If it crumbles, incorporate a few drops of water or oil gradually until regaining a soft consistency.
How long can you keep homemade modeling clay?
Store it in an airtight container in a cool, dry place. Its duration varies according to the recipe and handling conditions; check its appearance and smell before each use and discard it at the first suspicious sign.
Can you make gluten-free modeling clay?
You can try a gluten-free flour, such as rice flour, but the texture may differ and require adjustments. Add water little by little and adapt the flour until obtaining a workable dough.


